

How Many Downlights Do You Need? Plan the Layout Before You Install
Downlights are often arranged on a ceiling before anyone has asked the most important question: what actually needs to be lit?
A neat grid may look organised on a plan, but it can become much less practical once kitchen cabinets, a dining table, a television, a shower enclosure or other fixed features are in place. The number of downlights you need also depends on ceiling height, light output and beam spread rather than floor area alone.
At Arrow Electricals, we recommend planning the finished room first and the holes in the ceiling second. This guide explains how to work from the room layout towards the quantity, spacing and position of the downlights instead of applying one fixed rule to every space.
Key takeaways
- There is no single downlight-spacing formula that works for every room.
- Confirm the final furniture, kitchen and bathroom layout before marking downlight positions.
- Decide what needs general light, task light or accent light before choosing the number of fittings.
- Ceiling height affects the size of the beam footprint and the amount of light reaching the surface below.
- Beam angle affects how widely each fitting spreads its light.
- Wider coverage does not automatically mean brighter light; lumen output still matters.
- Kitchens often need more task-focused illumination than bedrooms or living rooms.
- In bathrooms, aim for even coverage rather than assuming a fixed number of downlights.
- Use the product’s actual specifications and installation information where available rather than relying on a generic spacing rule.
Quick answer: how far apart should downlights be?
There is no universal distance that downlights should be spaced apart.
The right spacing depends on ceiling height, beam angle, lumen output, room shape and what the light needs to achieve. The aim is normally to create enough overlap between the useful light from neighbouring fittings to avoid obvious dark areas, without installing more downlights than the room needs.
| Planning factor | Question to ask | Why it matters |
| Final room layout | Where will cabinets, furniture and fixed features sit? | Prevents lights ending up above cupboards or in unhelpful positions |
| Room use | Is the light for general illumination, tasks or highlighting? | Different jobs require different positions and levels of concentration |
| Ceiling height | How far will the fitting be from the surface being lit? | Affects the spread and intensity of the light reaching the room |
| Beam angle | How widely does each downlight spread its light? | Affects coverage and overlap between fittings |
| Lumens | How much usable light does each fitting produce? | Beam width alone does not determine brightness |
| Furniture and worktops | Where will people actually need light? | Helps position fittings around use rather than an empty floor plan |
| Other lighting | Will pendants, wall lights or under-cabinet lighting also be used? | Downlights do not always need to provide every layer of light |
Arrow’s downlight range includes fixed, adjustable, mini, integrated LED, GU10, dimmable and bathroom-suitable options, so the layout should be developed alongside the type of fitting rather than independently of it.
Why a fixed spacing rule is only a starting point
Downlight advice sometimes uses simple formulas such as dividing the ceiling height by two to estimate the distance between fittings.
That can provide a rough starting point, but it cannot tell you whether the resulting layout will work in a particular room.
Two rooms with the same dimensions can need very different lighting. One may contain pale walls, an open floor and a pendant over the dining table. The other may contain tall cabinets, dark finishes, a large island and several areas where people prepare food.
The downlights should respond to those differences.
A more useful planning sequence is:
- Confirm the final room layout.
- Mark the main areas that need light.
- Decide which areas need general, task or accent lighting.
- Check the ceiling height.
- Choose a suitable light output and beam angle.
- Plot the first proposed downlight positions.
- Check the expected overlap and darker areas.
- Adjust the quantity and position before installation.
For broader guidance on choosing the fitting itself, see our complete UK guide to downlights.
Plan the finished room before marking the ceiling
One of the most useful pieces of information from the Arrow team is also one of the simplest: do not finalise the downlight positions before the room layout is final.
This becomes particularly important during renovations.
A blank kitchen ceiling may appear to suit four or six evenly spaced fittings. Once the design develops, however, the room may gain full-height cupboards, wall units, an extractor hood, open shelving, a large island or a bank of tall appliances.
A downlight placed according to the original empty-room grid may then:
- sit partly above a wall cabinet;
- illuminate the top of a cupboard instead of the worktop;
- create a shadow where someone stands to prepare food;
- fall awkwardly between an island and perimeter units;
- compete with a pendant or extractor light;
- no longer align with the finished room.
A common planning problem the Arrow team sees
The Arrow team reports that kitchen cabinets, cupboards and shelving can interfere with downlight positions when the lighting is planned too early.
The practical lesson is not that every kitchen needs a particular spacing. It is that the lighting plan should be developed from the finished kitchen drawing, including the position and depth of the cabinetry.
Moving a mark on a plan is easy. Moving a recessed fitting after the ceiling has been cut, wired and finished is not.
How ceiling height changes downlight spacing
Ceiling height affects both the spread and the intensity of light reaching the area below.
As the distance between the downlight and the target surface increases, the beam footprint generally becomes larger while the illuminance at that surface reduces. The exact result depends on the fitting’s optics and light output.
This is why ceiling height should be considered alongside both beam angle and lumen output.
Do not assume that a taller ceiling automatically means you should simply increase the distance between every fitting. A high ceiling may instead require:
- a different beam angle;
- higher-output fittings;
- more careful targeting of task areas;
- a combination of general and directional light;
- professional lighting calculations for larger or more demanding spaces.
The relationship between height, beam spread, and output is more important than any single spacing figure.
How beam angle changes the layout
Beam angle describes how widely the useful light spreads from the fitting.
In simple terms:
- a narrower beam concentrates the light into a smaller area;
- a wider beam distributes the light across a larger area.
That does not mean a wider beam produces more light. If two fittings have the same lumen output but different beam angles, the wider beam distributes that output across a larger area, while the narrower beam concentrates it more strongly.
Arrow currently lists downlights across a range of beam angles. For example, its 6W LED Mini Downlight in Black has a listed 36° beam angle, while the Adjustable 4W LED IP44 Mini Downlight uses a 60° beam.
These products also have different lumen outputs and other specifications, so they should not be compared on beam angle alone. They simply demonstrate why the optical specification needs to be part of the layout decision.
For a deeper explanation, see our guide to choosing a downlight beam angle.
More downlights are not always the answer
The Arrow team advises considering beam angle before simply increasing the number of fittings.
If an installation produces isolated bright areas with darker spaces between them, the problem may be the beam spread or position rather than an insufficient fitting count.
Equally, selecting an extremely wide beam simply to reduce the number of downlights is not automatically the answer. Light output, glare, ceiling height and the intended task still need to be considered.
The aim is useful overlap, not the greatest possible number of fittings.
How to plan kitchen downlights
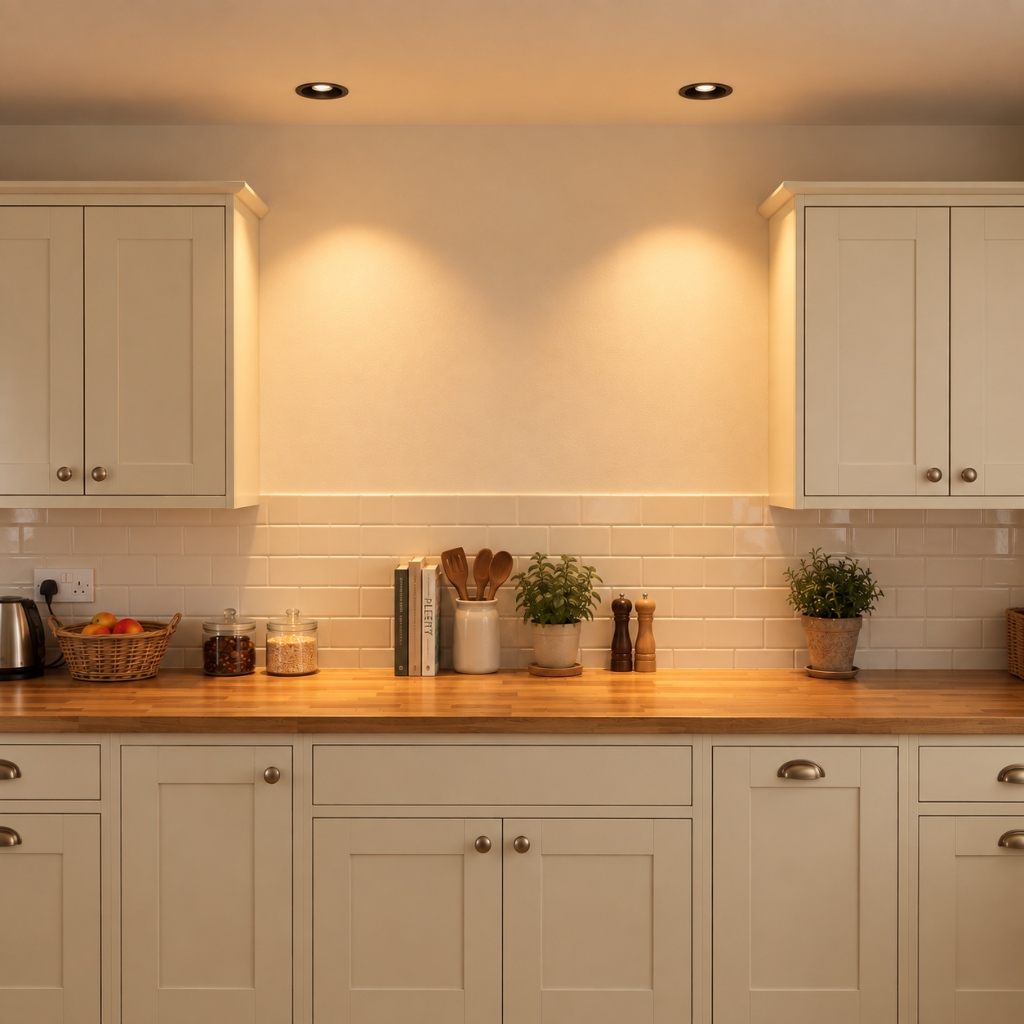
A kitchen is one of the clearest examples of why a generic ceiling grid can fail.
The room combines several different lighting requirements:
- worktops used for food preparation;
- sinks and hobs;
- islands and peninsulas;
- walkways;
- cupboards and tall units;
- dining or seating zones.
Start with the kitchen plan rather than the ceiling.
Light the worktop, not the top of the cabinet
One of the main tasks of kitchen downlighting is helping people see the work surface clearly.
If a downlight sits too far behind the working position, the person using the worktop can cast their own shadow across it. If it is placed too close to the wall, cabinets may block part of the beam.
The correct position depends on the depth and arrangement of the units, so work from the cabinet drawing rather than using one fixed distance from the wall.
Where directional control is useful for targeting a surface or feature, Arrow’s adjustable downlights provide examples of fittings that allow the direction of the beam to be changed.
Treat islands as their own lighting zone
A kitchen island may already have pendant lights above it. If so, the surrounding downlights should complement those fittings rather than duplicate them unnecessarily.
If the island relies on recessed lighting for task illumination, position the fittings according to the usable work surface and seating arrangement.
This is why the number of downlights in a kitchen cannot sensibly be determined from square metres alone.
Arrow’s kitchen downlight range includes fixed and adjustable options for different lighting requirements
Brightness and colour temperature are separate decisions
The Arrow team generally sees customers wanting higher light levels for practical kitchen tasks, with some preferring a cooler colour temperature in working areas.
Those are separate decisions. A cooler colour temperature does not inherently make a fitting brighter.
A kitchen used mainly for cooking may benefit from a different lighting character from an open-plan kitchen that also functions as a dining and relaxation area. Colour-changeable or layered lighting can help a multifunctional space support both tasks and atmosphere.
Plan the required light level and distribution first, then choose the colour temperature that suits how the space will actually be used.
How to plan bathroom downlights
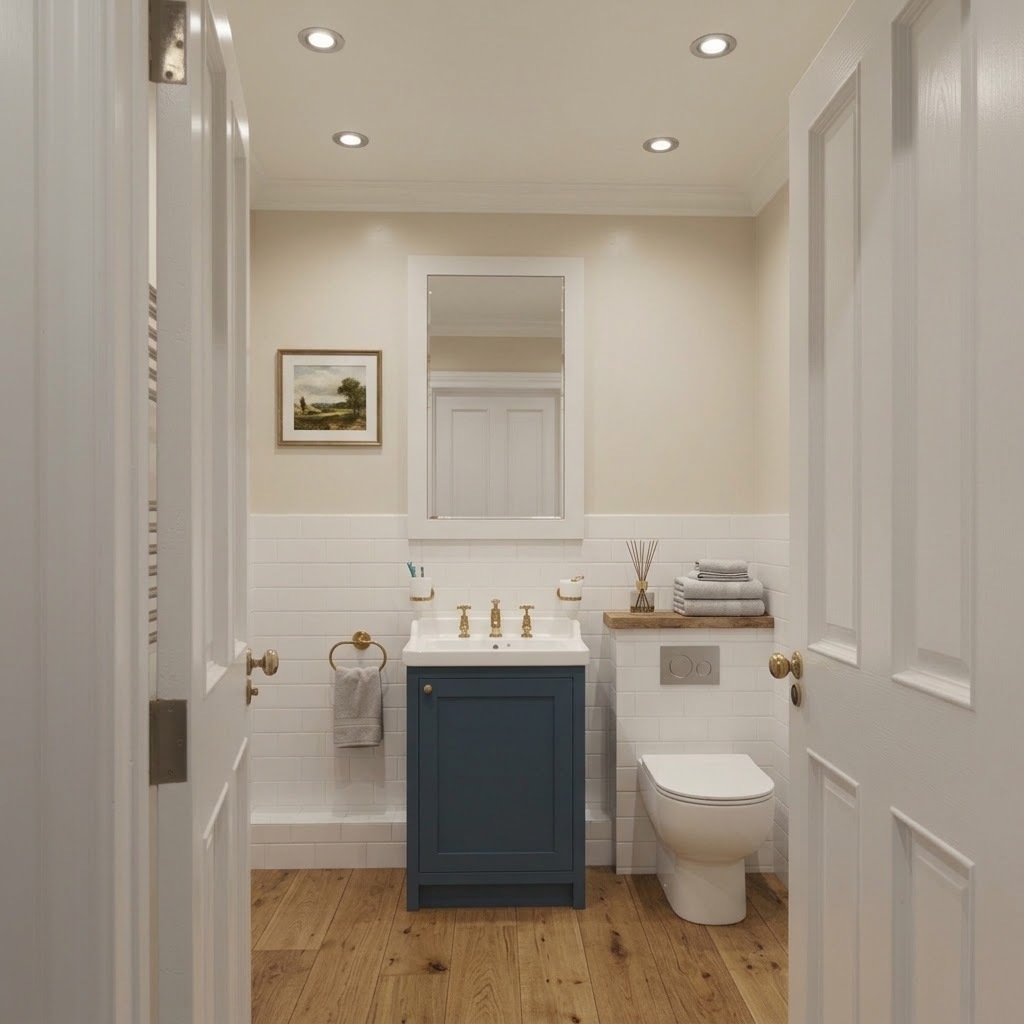
Bathrooms usually benefit from even general illumination, but mirrors, showers, baths and other features affect both positioning and fitting choice.
Electrical suitability also matters. The required IP protection depends on the precise position of the fitting within the bathroom. Under BS 7671, equipment in bathroom Zones 1 and 2 generally requires at least IPX4, with greater protection required where water jets are likely.
Arrow’s bathroom downlight range includes fittings with different IP ratings for different requirements. Check the exact fitting specification and intended location with a competent electrician before installation.
Three downlights or four? Start with the coverage
The Arrow team says some bathroom customers initially plan for three downlights but are sometimes advised that four may provide more even distribution and reduce darker areas.
That is a useful real-world example, but four is not a rule for bathrooms.
A compact bathroom may need fewer fittings. A larger or irregularly shaped room may need more. Beam angle, lumen output, ceiling height, shower position and other lighting all affect the answer.
The useful question is:
Will the proposed layout provide even light where it is actually needed?
If adding a fourth fitting improves the coverage and removes a dark area, it may be worthwhile. If three correctly specified and positioned fittings already achieve the required result, a fourth may simply add unnecessary light.
Do not rely on ceiling downlights alone at the mirror
Downlights directly above the head can create shadows across the face.
Where shaving, make-up or other detailed tasks happen at the mirror, consider dedicated mirror or wall lighting as part of the overall scheme.
The downlights can then provide general room illumination rather than being expected to solve every lighting requirement.
How to plan living-room downlights
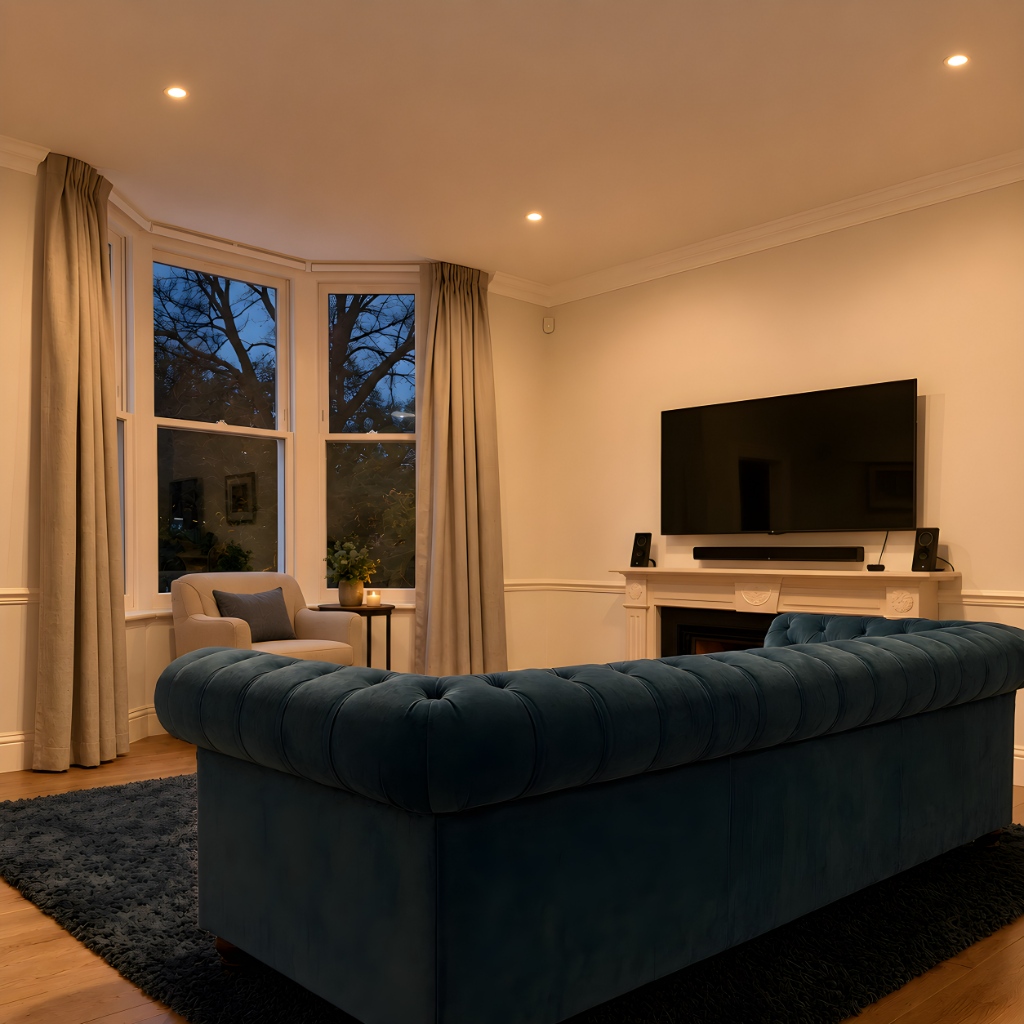
Living rooms usually need more flexibility than sheer brightness.
A room may contain:
- a television area;
- sofas and chairs;
- artwork;
- shelving;
- a fireplace;
- reading positions;
- table and floor lamps.
That makes a rigid grid less useful than a layered plan.
Start with the activities and features you actually want the downlights to support.
A small number of well-positioned fittings may provide the general light, while adjustable downlights can highlight artwork or architectural features and floor or table lamps create softer evening illumination.
This also reduces the risk of filling the ceiling with recessed fittings simply because space is available.
Think about the television before positioning the lights
Avoid designing the ceiling in isolation from the television position.
A poorly placed fitting may produce distracting glare or reflections on the screen. Mapping the seating and television area before fixing the ceiling positions allows the lighting to be adjusted accordingly.
This is another reason the room layout needs to come before the downlight grid.
How to plan bedroom downlights
Bedrooms generally need less task-focused ceiling illumination than kitchens.
The main priorities are usually comfortable general light, circulation and specific areas such as wardrobes, dressing spaces or a desk.
Instead of covering the entire ceiling with a uniform grid, consider whether the downlights need to illuminate:
- the foot and sides of the bed;
- wardrobe doors and interiors;
- a dressing area;
- artwork;
- a desk or reading space.
Bedside lamps, wall lights and wardrobe lighting can then provide additional layers.
The Arrow team generally sees warmer light preferred in bedrooms and living rooms. This should still be treated as a preference rather than a rule: the best colour temperature depends on the interior, other light sources and the atmosphere you want to create.
How many downlights do you actually need?
There is no reliable answer based on room type alone.
Two kitchens of the same floor area can require different numbers of downlights because they have different:
- ceiling heights;
- cabinet layouts;
- worktop positions;
- beam angles;
- lumen outputs;
- wall and surface finishes;
- task requirements;
- supplementary lighting.
The same applies to bathrooms, bedrooms and living rooms.
Rather than starting with “How many fittings should I buy?”, start with:
- What needs lighting?
- How bright does each area need to be?
- What other light sources will be present?
- How high is the ceiling?
- What beam angle and lumen output does the proposed downlight provide?
- Where can the fittings physically be installed?
- Will the beams overlap sufficiently to avoid unwanted dark areas?
Only then does the final quantity become meaningful.
Should downlights always be arranged in a grid?
No. A grid can work where the room itself is symmetrical, and the aim is even general illumination. It is not automatically the best layout simply because it looks neat on the ceiling plan.
A kitchen may need fittings aligned to work surfaces rather than the geometric centre of the room. A living room may benefit from light around seating zones and features. An irregular bathroom may need positions adjusted around a shower or vanity.
The ceiling should still look considered, but visual symmetry should not override useful lighting.
Where possible, look for both a logical visual relationship between fittings and a functional relationship between the light and the room below.
Fixed or adjustable downlights for layout planning?
Fixed downlights direct their beam straight down and are often suited to even general illumination.
Adjustable downlights allow the light to be aimed towards a worktop, artwork, shelving or another feature. They can also help where the ceiling or room geometry makes a purely vertical beam less useful.
That does not mean adjustable fittings should be used everywhere.
For large areas of general light, fixed fittings can create a cleaner, more consistent result. Use directional capability where it solves a specific lighting problem.
The choice between fixed and adjustable fittings should therefore follow the purpose of each position rather than become a design-wide assumption.
Common downlight layout mistakes to avoid
Many poor layouts are caused by making the ceiling plan before understanding the room below it.
Common mistakes include:
- using the same spacing formula for every room;
- fixing the layout before kitchen cabinetry is finalised;
- positioning lights where cupboards or shelving will block the beam;
- focusing on floor area while ignoring worktops and furniture;
- adding more fittings without checking beam angle;
- choosing beam angle without considering lumen output;
- using an attractive grid that does not correspond to the room’s tasks;
- overlooking shadows created by people standing at worktops;
- expecting downlights to replace all other layers of lighting;
- ignoring mirrors, television screens and reflective surfaces;
- forgetting that bathroom positions must also suit the required IP protection;
- buying the fittings before confirming the complete layout.
A better plan does not necessarily contain more downlights. It contains the right fittings in the right positions for the finished room.
Downlight spacing and layout FAQs
These questions cover the practical decisions that most often arise when moving from a room plan to the final ceiling layout. They also address some of the common assumptions that can lead to too many fittings, uneven coverage or positions that do not suit the finished room.
What is the standard spacing between downlights?
There is no single standard spacing suitable for every installation. Ceiling height, beam angle, lumen output, room use and the position of furniture or work surfaces all affect the appropriate distance between fittings.
Should downlight spacing be half the ceiling height?
Using half the ceiling height is sometimes suggested as a rough starting point, but it should not be treated as a design rule. Check beam spread, output and the actual room layout before finalising the positions.
How far should downlights be from the wall?
There is no universal wall distance. The correct position depends on whether you are trying to wash the wall with light, illuminate a worktop, avoid cabinet shadows or provide general room lighting. Plan from the surface you want to light.
How many downlights should I use in a kitchen?
The number depends on the kitchen size, ceiling height, cabinet and island layout, chosen downlight output and other lighting. Work from the final kitchen plan rather than applying a fixed number per square metre.
How many downlights should I use in a bathroom?
There is no fixed bathroom quantity. Arrow sometimes sees customers considering three fittings where four would provide more even coverage, but the correct number depends on the room dimensions, light output, beam angle and layout.
Does a wider beam angle mean I need fewer downlights?
Potentially, but not automatically. A wider beam spreads the available light across a broader area. Lumen output, ceiling height and required brightness still need to be considered before reducing the fitting count.
Should downlights be evenly spaced?
They should normally create a visually considered and sufficiently even result, but identical spacing is not always appropriate. Task areas, furniture, cabinets and room features may justify moving individual fittings away from a strict grid.
Should I position kitchen downlights before the cabinets are installed?
You can plan the lighting before installation, but the final cabinet layout should already be confirmed. The Arrow team sees problems where lighting positions are fixed before cupboards, shelves and work surfaces have been finalised.
Do I need an electrician to plan downlight positions?
For a simple room, you may be able to develop an initial layout yourself, but the final electrical installation should be assessed and carried out by a competent electrician. More complex rooms or projects with demanding lighting requirements may also benefit from professional lighting design.
Plan what needs lighting before you plan the ceiling
Good downlight spacing is not about finding one perfect distance and repeating it across every room.
Start with the finished layout and decide where people will work, sit, walk and need light. Then consider the ceiling height, required brightness, beam angle and other lighting already planned for the space.
Once those factors are clear, the number and position of the downlights become much easier to determine.
Recent Posts
-
How Many Downlights Do You Need? Plan the Layout Before You Install
Downlights are often arranged on a ceiling before anyone has asked the most important question: wha …10th Sep 2026 -

Door Locks and Latches Explained: Which Type Does Your Door Need?
Choosing a door handle is usually straightforward because you can see the style, shape and finish. …28th Aug 2026 -
How to Choose a Chandelier by Room, Ceiling Height and Drop
A chandelier can transform a room, but the design is only one part of the decision. Its width, tota …15th Aug 2026