
Transform Your Kitchen: Your Essential Checklist for Upgrading Downlights
Good lighting in the kitchen is essential as it enhances visibility, creates a safe cooking environment, and contributes to the overall ambience, making tasks more efficient and enjoyable. Downlights are a great option for the kitchen, offering contemporary, customisable style and focused illumination. This article covers everything you need to know about upgrading your downlights with expert advice on downlight selection, technical considerations, installation and maintenance.
Assessing Your Current Lighting
Upgrading your kitchen lighting can vastly improve functionality, safety, and aesthetics. With modern fixtures and strategic placement, you can achieve balanced, glare-free illumination that enhances visibility, creates ambience, and makes your kitchen a more enjoyable and efficient space for daily activities.
Assessing your current kitchen lighting involves an evaluation of its effectiveness and identifying any limitations that may hinder functionality and aesthetics. Begin by observing light distribution throughout the space—note areas that are poorly illuminated or overly shadowed, which can impede tasks such as food preparation and cooking.
Consider the type of fixtures in use and their positioning—outdated or improperly placed fixtures may result in uneven lighting and glare. Additionally, assess the quality of light produced—is it too harsh, too dim, or lacking in colour rendition? Pay attention to the overall ambience—is the lighting conducive to a welcoming and comfortable atmosphere? By recognising these limitations, you can better understand the need for an upgrade.
Planning Your Upgrade
Setting clear goals is essential to ensure the desired outcome when planning your kitchen lighting upgrade. Begin by outlining your priorities, such as creating ambience, improving energy efficiency, enhancing functionality, and aligning with your preferred style. Determine the desired mood for your kitchen—whether you seek a bright, energising atmosphere for cooking or a warm, inviting ambience for dining and entertaining.
Next, consider energy-efficient options such as LED fixtures to reduce utility costs and environmental impact. Assess the functionality of your lighting scheme by ensuring adequate illumination for cooking, food preparation areas, and task zones. Also, choose fixtures that complement your kitchen’s aesthetic, whether sleek and modern or rustic and traditional.
When determining the right number of downlights for your kitchen, a general guideline is to space them evenly to provide uniform illumination. Aim for approximately one downlight per every 4-6 square feet of ceiling space. For example, in a kitchen with a 12×12-foot area, you may install 8-12 downlights for optimal coverage. However, adjust the number based on factors such as ceiling height, natural light sources, and specific task areas that require additional lighting.
Consider the layout of your kitchen when deciding where to place downlights. Focus on key areas such as countertops, islands, and sink areas where task lighting is crucial for safety and functionality. Install downlights directly above these areas to minimise shadows and provide adequate illumination for food preparation and cooking tasks. Additionally, position downlights strategically along the kitchen’s perimeter to evenly distribute light and prevent dark corners.
By carefully planning the placement of your downlights, you can achieve optimal illumination throughout your kitchen, enhancing both functionality and aesthetics.
Choosing the Right Downlights
When choosing downlights, there are several important factors to consider, including the style, size, and features you desire.
Types of Kitchen Downlights
There are different types of downlights to choose from, including:
- LED Downlights: Energy-efficient and long-lasting, LED downlights consume less power while providing bright illumination, making them an eco-friendly choice for modern kitchens.
- Dimmable Downlights: Offering adjustable brightness levels, dimmable downlights allow you to create various lighting atmospheres, from task-focused brightness to ambient mood lighting, providing versatility and control.

- Tiltable Downlights: With adjustable heads, tiltable downlights offer flexibility in directing light precisely where needed, making them ideal for highlighting specific areas or features in the kitchen.

- Mini Downlights: Compact and discreet, mini downlights are perfect for installations where space is limited or for creating a minimalist aesthetic without compromising on illumination quality.

- Black Downlights: Featuring sleek black finishes, these downlights add a touch of sophistication and modernity to kitchen spaces, complementing contemporary design schemes.
- White Downlights: Designed to blend with white ceilings seamlessly, white downlights offer a discreet and unobtrusive lighting solution, maintaining a cohesive look in the kitchen.
- Chrome Downlights: With a reflective chrome finish, these downlights add a touch of elegance and glamour to kitchen interiors, enhancing the overall aesthetic appeal with a polished metallic sheen.
Colour Temperature
Colour temperature refers to the warmth or coolness of light emitted by a bulb, typically measured in Kelvin (K). In a kitchen, warm lighting (2700-3000K) creates a cosy, inviting atmosphere, while cool lighting (4000-5000K) enhances visibility and creates a bright, energetic ambience, catering to different moods and tasks within the space.
To choose the right colour temperature, consider how you use your kitchen – is it used for entertaining or mainly practical tasks? If you’d prefer to have the option to adjust the temperature or brightness of your lighting, consider dimmable downlights or ones with colour change technology (CCT).
Brightness
Brightness (measured in lumens) directly impacts the visibility and functionality of a kitchen. For smaller kitchens (approximately 100-200 square feet), aiming for around 4000-6000 lumens provides adequate illumination without overwhelming the space with excessive brightness. Conversely, larger kitchens (approximately 300-400 square feet or more) may require higher lumen output, ranging from 8000-10,000 lumens, to ensure even coverage and optimal visibility across the expansive area.
The numbers provided represent the total lumen output for multiple lights combined in the kitchen space. Depending on the layout and size of the kitchen, you may use multiple light fixtures such as downlights, pendant lights, or track lighting to achieve the desired total lumen output. It’s essential to distribute the lighting evenly throughout the space to avoid dark spots and ensure consistent illumination for all tasks.
Beam Angle
The beam angle of a light fixture determines the spread of light, and it plays a crucial role in both functionality and mood-setting in the kitchen. A wider beam angle provides broader coverage, making it suitable for general illumination. In comparison, a narrower beam angle offers focused lighting, ideal for task areas such as countertops or kitchen islands. In downlights, a wide beam angle typically ranges from 90-120 degrees, while a narrow beam angle typically ranges from 15-45 degrees.
The choice between a wide or narrow beam angle can significantly impact the mood and ambience of the kitchen. A wide beam angle creates a bright, open atmosphere, making the space more expansive and welcoming. It promotes a sense of comfort and relaxation, perfect for casual gatherings or family meals. In contrast, a narrow beam angle produces a more focused and intimate lighting effect, drawing attention to specific areas and creating visual interest. This focused illumination can evoke a sense of warmth and cosiness, ideal for creating a cosy ambience during evening gatherings or intimate dinners.
Technical Considerations
Before buying downlights, it’s important to understand a few technical factors like IP ratings, energy efficiency and compatibility with existing electrical infrastructure.
Understanding IP Ratings
Understanding IP (Ingress Protection) ratings is crucial for selecting suitable lighting fixtures for kitchen environments. In the kitchen, where moisture, steam, and grease are prevalent, IP ratings indicate the level of protection against these elements.
An IP65 rating signifies that the fixture is dust-tight and protected against low-pressure water jets, making it suitable for areas prone to splashes and damp conditions. An IP44 rating offers protection against solid objects larger than 1mm and splashing water, making it suitable for general lighting applications in less exposed kitchen areas, such as above countertops or sinks.
Some kitchen downlights are also fire-rated. Fire-rated downlights are designed with additional features such as intumescent seals and fire-rated enclosures to help prevent the spread of fire in ceilings, making them essential for maintaining safety in kitchen environments. This GU10 fire-rated downlight, for example, is a great low-cost, LED-compatible option.
Energy Efficiency
Selecting energy-rated downlights for the kitchen is crucial for reducing electricity consumption and lowering utility costs. Energy-efficient fixtures not only help minimise environmental impact but also contribute to creating a sustainable and eco-friendly kitchen environment for years to come. Check the specifications and labelling of downlights to ensure they’re energy-efficient before buying.
Compatibility
Before purchasing downlights, ensure compatibility with your electrical setup by checking voltage requirements, fixture size, and wiring connections. Refer to the product specifications and consult a qualified electrician if necessary to confirm that the downlights suit your existing electrical infrastructure.
Installation Tips
Several essential factors must be considered when installing kitchen downlights to ensure safety, compliance, and optimal performance.
DIY vs Professional Installation
Opting for DIY installation offers potential cost savings and a sense of accomplishment, especially for those with basic electrical skills. However, DIY installation may pose electrical hazards or improper fitting risks, potentially compromising safety and functionality.
On the other hand, professional installation ensures expertise and compliance with electrical regulations, minimising risks and guaranteeing optimal performance. While it may involve additional costs, professional installation provides peace of mind and ensures a seamless integration of downlights into the kitchen space.
Ultimately, the choice between DIY and professional installation depends on individual skill level, budget, and preference for safety and quality assurance.
Downlight Installation
The following steps provide a general guide for kitchen downlight installation:
- Plan Fixture Placement: Determine the optimal locations for downlights based on kitchen layout and lighting requirements, ensuring even coverage and adequate illumination throughout the space.
- Turn Off Power: Before installation, switch off the power at the circuit breaker to prevent electrical accidents and ensure safety during the installation process.
- Cut Openings: Use a hole saw or cut-out template to create openings in the ceiling for the downlight fixtures, ensuring they are positioned accurately and securely.
- Connect Wiring: Follow manufacturer instructions to connect the wiring from the downlights to the electrical junction box, ensuring proper polarity and secure connections to prevent electrical hazards.
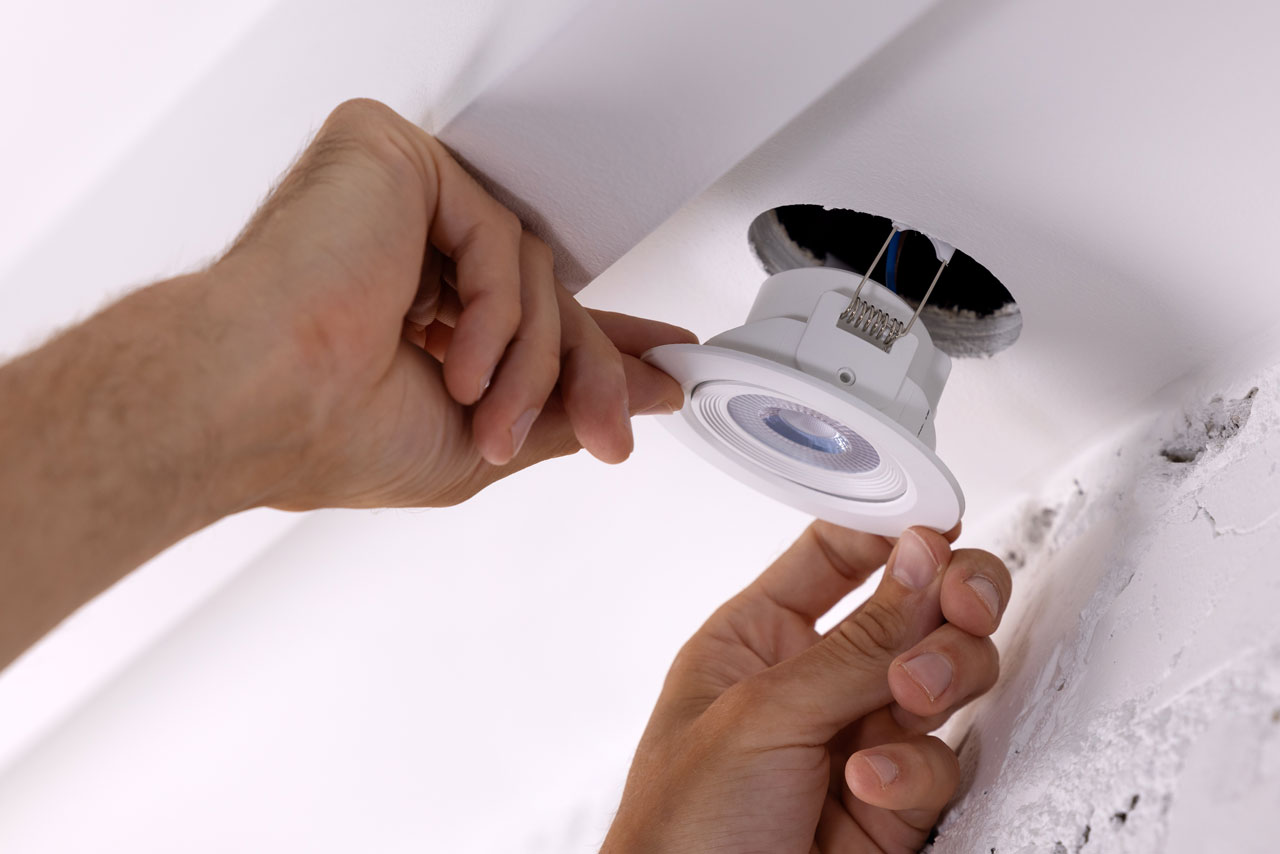
- Secure Fixtures: Insert the downlight fixtures into the ceiling openings and secure them in place using mounting brackets or spring clips, ensuring they are flush with the ceiling surface for a professional finish.
- Test Functionality: After installation, restore power and test the functionality of each downlight to ensure they illuminate properly and operate as expected.
- Seal Gaps: Seal any gaps between the fixture and ceiling with fire-resistant caulk or insulation to prevent drafts and maintain energy efficiency.
- Install Trim: Attach trim rings or bezels to the downlight fixtures to provide a finished look and enhance the aesthetics of the kitchen space.
Remember, if you do not have the necessary skills required for DIY installation, it’s important to consult a professional electrician.
Safety Considerations
When installing kitchen downlights, it’s important to remember the following safety considerations:
- Turn Off Power: Before beginning any installation work, switch off the power at the circuit breaker to avoid the risk of electrical shock or injury.
- Use Ladders Safely: When working at heights, ensure that ladders are stable and positioned correctly to prevent falls or accidents.
- Wear Protective Gear: Use appropriate personal protective equipment such as gloves and safety goggles to protect against cuts, scrapes, and debris.
- Check for Wiring Hazards: Before cutting into the ceiling, check for any hidden wiring or pipes to avoid accidental damage or electrical hazards.
- Use Correct Tools: Use tools specifically designed for the task and ensure they are in good condition to prevent accidents or injuries.
- Work in Well-Lit Areas: Ensure adequate lighting in the work area to avoid tripping hazards and improve visibility during installation.
- Follow Manufacturer Instructions: Adhere to manufacturer guidelines and instructions when installing downlights to ensure proper installation and safety compliance.
- Avoid Overloading Circuits: Do not overload electrical circuits by connecting too many downlights to a single circuit, which can lead to overheating and fire hazards.
- Test Before Final Installation: Test each downlight before final installation to ensure proper functionality and wiring connections, reducing the risk of future issues or malfunctions.
Finishing Touches
When selecting downlights for your kitchen, consider fixtures that complement the overall theme and design aesthetic. Downlights are available in various sizes, styles, and colours, so choose ones that complement the style and décor of your kitchen.
In addition to downlights, consider incorporating pendant lights above kitchen islands or dining areas to add visual interest and task-specific illumination. Under-cabinet lighting, such as LED strips or puck lights, can also provide supplementary task lighting, enhancing visibility on countertops while adding a subtle ambience to the kitchen.
Maintenance Tips
Once installed, consider the following maintenance tips to ensure longevity and performance:
- Regular Cleaning: Wipe down downlights with a soft cloth to remove dust and grease buildup, ensuring optimal light output and preventing overheating.
- Check for Loose Connections: Periodically inspect wiring connections to ensure they are secure and free from corrosion, reducing the risk of electrical issues or malfunctions.
- Replace Bulbs as Needed: Replace bulbs promptly when they burn out to maintain consistent illumination levels and prevent strain on the fixture.
- Inspect Trim and Seals: Check trim rings and seals for damage or deterioration, replacing them as necessary to maintain a secure and weatherproof seal around the fixture.
- Keep Vents Clear: Ensure that air vents on downlights are clear of obstructions to prevent overheating and prolong the fixture’s lifespan.
- Monitor Dimming Performance: If using dimmable downlights, monitor dimming performance regularly to ensure smooth operation and avoid flickering or buzzing noises.
- Schedule Professional Inspection: Consider scheduling periodic inspections by a qualified electrician to ensure downlights are in good working condition and comply with safety regulations.
Conclusion
Upgrade your lighting to transform your kitchen into a well-lit and inviting space. Kitchen downlights provide focused illumination, reducing shadows and glare and enhancing visibility while performing food preparation and cooking tasks. They also look great, providing a contemporary aesthetic that can be tailored to the style of your kitchen. For more inspiration, browse our extensive range of downlights today.
Recent Posts
-

How to Choose a Crystal Chandelier: Styles, Finishes and Practical Checks
A chandelier does more than light a room. It draws the eye upward, changes the mood of the space an …23rd Jun 2026 -

Downlights: The Complete UK Guide to Choosing the Right Fitting
Downlights have become the most widely chosen ceiling light across UK homes and commercial spaces — …13th Jun 2026 -

How to Clean a Chandelier: The Complete Guide to Crystal and Glass Fittings
A chandelier that is not cleaned regularly loses its sparkle — and more besides. Dust, grease, and …21st May 2026